The magic of Christmas lights is undeniable, creating a warm and festive atmosphere that brings jo
Se næste indlæg >
The Ultimate Permanent Christmas Light Installation Checklist for Edmonton Home Owners
jcp.canstar@gmail.com
![]()
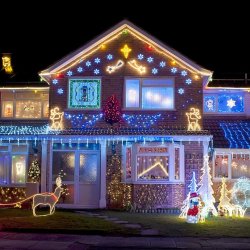
The holiday season brings joy and warmth, and what better way to spread that festive spirit year-round than with permanent Christmas lights? If you are thinking of sprucing up your home with these durable lights, follow our ultimate durable Christmas light installation for a simple and stunning display.
1. Plan your schedule:
Before you dive into the installation process, think about how you want your permanent Christmas lights to change your home. Consider architectural features, landscaping, and any special features you want highlighted. Planning ahead creates a uniform and visually appealing design.
2. Measurements and calculations:
Accurate measurements are essential to buying the right number of lights and accessories. Measure the width of the house, windows, and other areas you plan to renovate. Calculate all necessary lengths and add some to account for angles and turns.
3. Choose high-end lights:
Invest in high-quality perennial Christmas lights to last longer and longer. Choose energy-efficient LED lights that are weather resistant and designed to withstand a variety of Edmonton weather conditions. High-quality lighting ensures a vibrant display that will last for years without constant replacement.
4. Gather the essentials:
Before you start installing, gather all the materials you need. This includes properly attaching lights, extension cords, ties or chains, ladders, and timers if you want to automate your lighting system reducing obstacles in the installation process by whatever you have in your hands.
5. Check your property’s electrical system:
Make sure your property’s electrical system can handle the overload of perennial Christmas lights. Consider consulting with an electrician to make the necessary adjustments to ensure a safe and effective installation.
6. Safety First:
Prioritize safety during installation. Use a sturdy ladder on a flat surface, secure the extension cords to prevent a slip hazard, follow the manufacturer’s instructions for the maximum number of lights per circuit Use the help of a friend or family member to make the process easier and safer if necessary.
7. Test before installation:
Before permanently installing your lights, test each wire to make sure it is working properly. This step helps identify any damaged bulbs or wiring problems before installation, saving you time and frustration later.
8. Start the installation:
Start arranging your permanent Christmas lights according to your design plan. Use ropes or screws that will not damage the exterior of your property. Pay careful attention to spacing and symmetry and take your time to achieve a sleek and elegant look.
9. Wiring is secure and confidential:
Organize your installation by securing cables and hiding them as much as possible. Use clips or adhesive cable organizers to tie cables around the edges of your home, so they don’t become an eyesore.
10. Use a timer:
Increase comfort and energy efficiency by incorporating timing into your regular Christmas light display. A timetable allows you to create specific lighting patterns, ensuring that your home is beautifully lit each evening without the need for manual control.
Conclusion
By following these Permanent Christmas light installations checklist, you will be well on your way to creating a stunning and long-lasting holiday display for your Edmonton home. Embrace the magic of permanent Christmas lights that shine not only during the holidays but every season all year round.

Ingen kommentarer endnu